Commons:アップロード前の画像の準備
Shortcut: COM:USOP ウィキメディアコモンズに画像ファイルを投稿する場合、その内容に適したフォーマットを用いることが大切です。 画像サーバのストレージ領域は希少なものではないため、情報の欠落をするべきではありません。
一般的には、フォーマットと圧縮システムは結びついています、複数の圧縮システムが利用可能なフォーマットもありますが。基本的な選択肢としては、
- SVGは、単純な図(特に縮小や拡大が必要なもの)に
- PNGは、ベクタ形式で容易にあるいは効果的に生成できないものに
- JPEGは、写真や写真同様の画像(つまり、3Dビデオゲームのスクリーンショット、その他、なんであれ単純な色彩ではないもの)に
適しています。
- これら以外の画像フォーマットはほとんどの場合避けるべきです:
- BMP – 非圧縮の画像データであり、ファイルサイズが大きくなります。通常はPNGに変換すべきです。
- GIF – ファイルが大きくなる可能性があり、拡張性が乏しく、色再現度も低くなります。 アニメ以外はPNGに変換すべきです。
図表
The editability and scalability of SVG (Scalable Vector Graphics) make the format the obvious choice for graphic representation of data and illustrations. However, it is not always easy to convert raster images like GIFs, PNGs, or JPEGs to SVG, and some images (especially photos) are not conducive to this treatment. If a diagram cannot be produced in SVG then a PNG image is preferred over a JPEG.
The PNG compression algorithm is designed to work with large areas of solid color that have sharp boundaries. It is, therefore, a good format for diagrams and cartoons. But it does not automatically give you the smallest possible file size. There are some things that need to be done by hand.
There is a myth among many web designers that PNGs are larger than GIFs. This myth stems from two facts:
- Many people compare 24 bit PNG with 8 bit GIF, which is an invalid comparison.
- Photoshop is historically known for being poor at creating PNG files.
画像中の文字列はテキストに変更

|

|
| 題名の文字列を キャプションに使用 | |
|---|---|
| 画像の中にタイトルを含む場合 1248バイト |
画像の中にタイトルを含まない場合 854バイト (+74バイトの画像説明) |
図表中に題名が置いてありますか? 置いてある場合は、画像からその題名を含んだ部分を除去し、画像のキャプションとしてテキストで別記することを検討してください。ここで言うテキストとはプレーンテキストをさします:
- Takes up less space than the equivalent text in an image;
- Can easily be changed;
- Scales up into larger or smaller font sizes;
- Can be searched;
- Can be copied and pasted;
- Can be translated into other languages so that the same diagram can be used in other Wikipedias.
図表を JPEG で保存しないでください

|

|
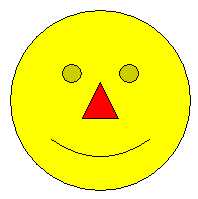
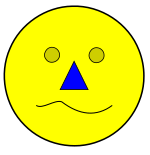
| この JPEG 画像は 圧縮でロスが発生 |
Enlarged view showing |
|---|
To the right is an example of a file saved as JPEG when it should have been saved as PNG. JPEG uses lossy data compression meant for photographs. Compressing drawings or diagrams with JPEG results in an image of poor quality, because the human eye can spot the compression artifacts around the edges.
Another drawback is the large file size you will end up with. JPEG compression has many options but most commonly only two color spaces: 24-bit RGB (8 bits per sample) and 8-bit greyscale. Most importantly, JPEG by its nature cannot support indexed color. In the example on the right, a 4-color image is inflated by using an inappropriate color schema, which results in the rather large file size.
If you do not have an original file but only a JPEG that really should be a PNG, do not simply save the JPEG as PNG because this will result in an even larger file.
PNGよりもSVGを使ってください

|

|

|
| PNG画像の拡大 | SVG画像の拡大 | SVGへの簡単な変更 |
PNG is a raster graphics format, encoding the value of each individual pixel, while SVG is a vector graphics format that encodes an image as a series of geometric constructs. If this confuses you, don't worry; you don't need to understand the technical aspects to create or upload images. What this means in practice is that an SVG image scales to different sizes far better than an equivalent PNG. Therefore, for images that consist largely or entirely of polygons, lines, and curves (national flags, road signs, etc.), SVG is the preferred format. Shown here are two example enlarged crops of an image, one in SVG format, one in PNG format. The difference in quality is obvious.
SVGs can also be easily altered with a text editor. This makes updating and translating illustrations much easier. Unfortunately, text rendering is the most inconsistent part of SVG implementations so some users find it necessary to convert text to outlines, which removes this advantage. If it is felt necessary to convert text to outlines then a version with unconverted text should be uploaded first (for editing) followed by a version with converted text (for consistent rendering). Editors on Linux and other UNIX-like systems have the fewest difficulties with fonts in SVG because they usually have fonts in common with the Wikipedia servers, and they can use rsvg-view to preview SVGs exactly as MediaWiki will render them.
- 詳細についてはHelp:SVGを参照
JPEGのヒント
プライバシー公開に関する注意: 投稿された画像のEXIFのメタデータはすべて公開され、だれでも見られる状態になります。
上記の説明のとおり、JPEG形式 (Joint Photographic Experts Groupの略) は写真画像を想定して開発されました。JPEG アルゴリズムが最高というわけではありませんが、画質を保ったままファイルサイズを最小に抑えるヒントがいくつかあります。
- When saving a JPEG, the graphics program will let you choose the compression level. Usually the values range from 0 to 100 where 100 is the best quality possible with very little compression applied (some apps, most notably Paint Shop Pro have this scale in reverse with 0 as highest quality and 100 as the lowest quality). Don't mistake the 0 to 100 scale for a percentage, in that using 1/2 the setting does not result in 1/2 the quality, nor does it produce a file of 1/2 the size. Also, 100 does not mean “100%”, as the image is still compressed, resulting in some minute loss of detail. Since most JPEGs in Wikipedia will be rescaled anyway before appearing on pages, a quality setting of 95 is appropriate.
- JPEG compression works better on slightly blurred images, so don't sharpen the images too much as it will result in a higher footprint.
- Always work from the original image and not from the already saved JPEG file, as quality gradually decreases the more you save it. For this reason, it may be good to keep the main copy here in a lossless format like PNG. However, as of right now, scaled versions are forced to be in the same format as the original image and having two copies of the image is a maintenance nightmare.
- JPEG files can be losslessly compressed, with
jpegtran -optimize. Jpegtran is part of libjpeg. A package called littleutils contains a script calledopt-jpgthat automates JPEG optimization, usingjpegtranas the underlying engine. - JPEG files can also be losslessly compressed with a tiny free Windows program called JPGExtra, which removes all hidden “extras” that are typically added by digital cameras and image editing software.
PNGのヒント
- Note: Currently MediaWiki (1.17) does only sharpen thumbnails of true- and high-color images, so indexed PNGs display as less sharp (see phab:T31659). The current version of MediaWiki is 1.38 as of October 28, 2021.
Images which are not photographs, such as diagrams and screen captures of applications or older video games, use few colors. If it makes sense, save the image in indexed mode, see under section below.
It is normal for image editing programs to produce poor PNG compression, even when run with their maximum compression choices. As a result, there are a variety of tools to compress PNGs without any loss of quality. However, if the image will be scaled by MediaWiki before viewing, then these steps are pointless. Some such tools and information on using them is shown below.
- PNGOUT (gratis)
- OptiPNG (open source)
- Pngcrush (open source)
- AdvDef/AdvPNG, part of the AdvanceCOMP compilation (GNU GPL)
- DeflOpt (gratis)
- GIMP (gratis and GNU)
OptiPNG is generally better than pngcrush and usually significantly faster. AdvDef can be used after OptiPNG to further improve the results. AdvDef is straightforward to use, as it optimizes only the compression itself. A PNG Tools Overview published in 2014 also covers PNGwolf, PNGzopfli, and TruePNG.
For quick compression, simply use optipng with no options at all:
optipng file.png
If smallest results are desired and time is not important, a chain of this sort produces even smaller possible results:
optipng -o7 file.png
advdef -z4 file.png
pngout /ks file.png
deflopt file.png
Each of these utilities uses a different, more sophisticated “deflate” compression method variant on the PNG and generally produces a smaller file when run after the other tools. If the smallest result matters, try some experimenting to see what produces the best result.
After any compression, the image should be compared to the original. It’s occasionally the case that quirks in the original cause transparency to be lost even in compression which is intended to be lossless. This commonly, but not always, shows up as a change in the background color which is obviously visible at a glance.
For quick-and-dirty optimization, the opt-png script (found in the littleutils package) might be useful. It automates PNG optimization, utilizing pngcrush and a variant of pngrewrite as underlying engines.
Note also that these chains, particularly the pngrewrite step, will discard non-image blocks, often including copyright or creator details. Check the pngrewrite and other program options if you want to preserve this information.
- See also: meta:Fixing transparent PNGs
Choose a color depth appropriate for the number of colors

| ||
| 1-bit color No anti-aliasing 180 bytes |
4-bit color Anti-aliased 309 bytes |
Enlarged view of anti-aliased image |
|---|
A truecolor PNG can often be converted to indexed mode without changing the look of the image, while saving on file size. (See color depth for information on indexed mode and truecolor.)
Does the number of bits per pixel fit the number of colors in the image? Diagrams usually have few colors. If a diagram has 4 colors, there is no need to store it in a 24-bit (truecolor) format capable of distinguishing 16 million colors. The lower color depth versions of PNG store colors in a palette. Paletted images can have a bit depth of 1, 2, 4, or 8 bit (2, 4, 16, or 256 color). Use the lowest bit depth that can handle all colors in your image, although some image editing programs cannot create 2-bit color images.
If you are converting an image with many colors (perhaps because somebody saved the original as a JPEG, avoid this) to a PNG, you may want to reduce the number of colors at the same time; see w:Wikipedia:How to reduce colors for saving a JPEG as PNG.
If your image is anti-aliased you may be using more colors than you suspect, because anti-aliasing smooths jagged edges by adding shades of grey where once there was black or white. Anti-aliased black-and-white images usually need to be saved as 16-color or 256-color images instead. See the illustration at the right.
インターネットからのダウンロードのヒント
Before you prepare any content originating from Internet for uploading to Commons, it’s important to check its license terms. Most Internet’s content is copyrighted and ineligible for Commons, but there is a lot of free content as well.
It’s also important to check which grade of an image do you obtain. A common mistake of novices is uploading screenshots of Web browsers or other application software. Use only downloaded files unless you want namely a screenshot to be demonstrated.
Experienced Internet users are also not immune to some traps. Many sites, such as pxhere.com (examples) and sci.esa.int (examples), serve resized images for their Web content, and extra steps must be undertaken to access original files. Transferring images from such sites to Commons requires special care to ensure you get the highest-quality image. It may be a special download link of web form, a modified URL accessing file(s) invisible on Web pages, or (in some cases) registration on the site.
関連項目
- 配色のガイドライン – Commons:creating accessible illustrations
- 化学構造図の描き方 – Guidelines for drawing chemical structures
- アップロードする画像の準備 – Wikipedia:Preparing images for upload
- Wikipedia:画像利用の方針
- 画像作成のチュートリアル – Wikipedia:Graphics tutorials
- 修正が必要な画像 – Commons:Media for cleanup
- SVGのヘルプ – Help:SVG
- Commons:最大ファイルサイズ

このチュートリアルの前段階として、英語版ウィキペディアに化学構造図があがり、そのトークページ (*) で話し合いが行われました。それがきっかけで「アップロードする画像の準備」というページを英語版ウィキペディアに執筆したという経緯があります。(*=なお元のトークページは削除済み。)