Guideline for public transport

Hi! As you already know we have recently released an update of our app on Android!
And guess what? It allows our users to work out their routes using public transport, which will certainly help one to move through the concrete jungle faster. The OSM database, however, has some unchecked and dubious info, so we decided to give you a hand and show how to use the newest update to your advantage. Our instructions will be detailed, but, overall, not too complex, because we want you to engage in the process of forming OSM. Try not to break it, ok? Just kidding! If you need a bit more support use LearnOSM.
Guidelines on how to build or correct public transport routes
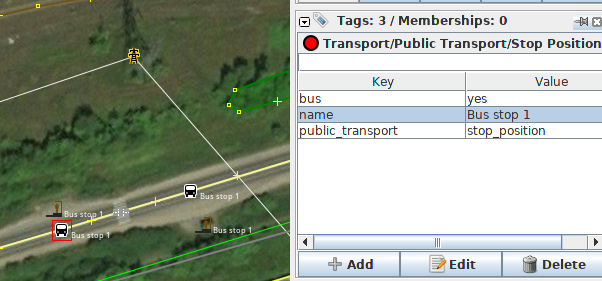
So, let us go through the process of mapping out a route together using JOSM. We have chosen to create a bus route. For starters, let’s mark our stops. There are two options in the settings, so one can either mark it as a regular bus stop (public_transport=stop_position), or as a place where the passengers will be waiting for the arrival of their bus (public_transport=platform). These stops should be included directly into your route. Then, you should attach some tags, such as public_transport=stop_position, name, etc. You also can use presets: find them in Presets - Transport - Public transport.
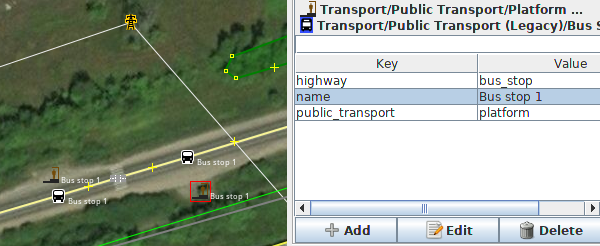
As a general rule, the platform for waiting passengers is located in front of a bus stop. It can be a node, a line or even a polygon. We will set two tags, one is public_transport=platform, and the other - highway=bus_stop (to meet the requirements of PT v1). We also encourage you to give it a name.
You need to match the first stop with the starting point of your route. Logically, the last stop has to be near the finish. If, however, you have to put it in the middle, you will need to split the segment there.
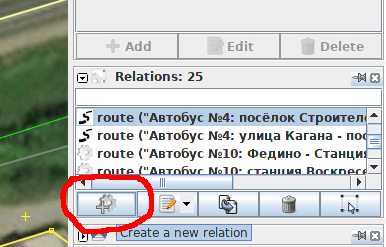
After checking whether we have tagged all the stops correctly, we will go on mapping out the route. We will need to search a panel on the right side of the screen for “Relations”. If you cannot find it, go directly to Windows -> “Relations”. Found it? Click on “Create a new relation”.
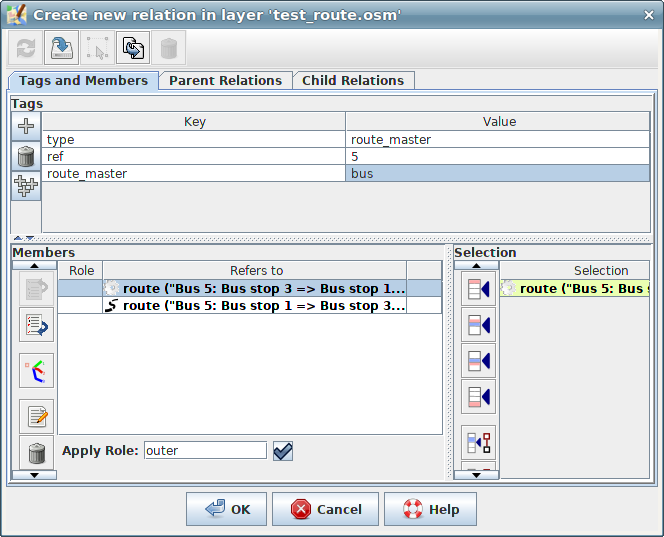
A window will pop up. Here, we will create the relations. One can find the description of any tag they may need here.
Let’s go ahead and add some tags:
type=route
route=bus
from=Bus stop 1
to=Bus stop 3
name=Bus 5: Bus stop 1 => Bus stop 3
ref=5
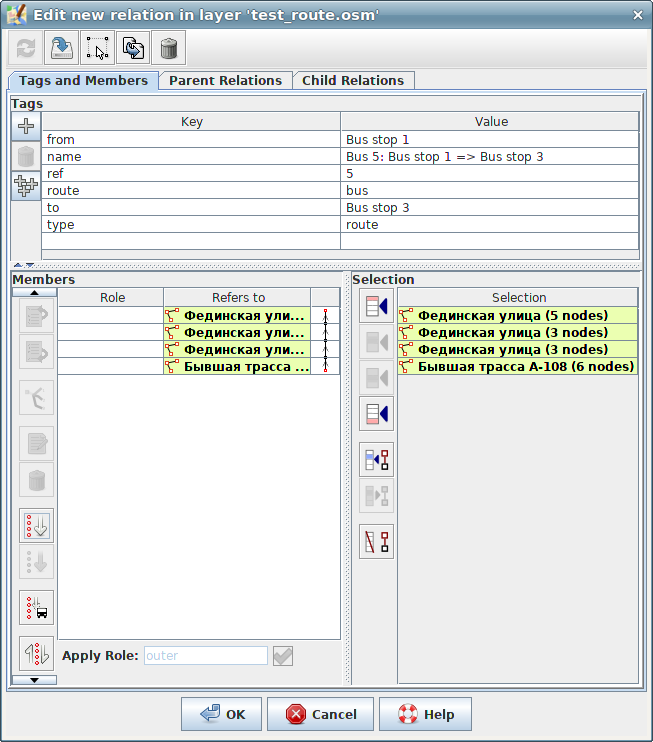
Our next task is to add other elements of our route. Go to the main window, do not close the window where you have been creating the relation, though. Successively select all the segments of the route, using the CTRL button for multiple marking. These segments will appear in the tab Selection in the window where we have been creating the relation.
Using the buttons circled in red, we will add them to the “Members” tab.
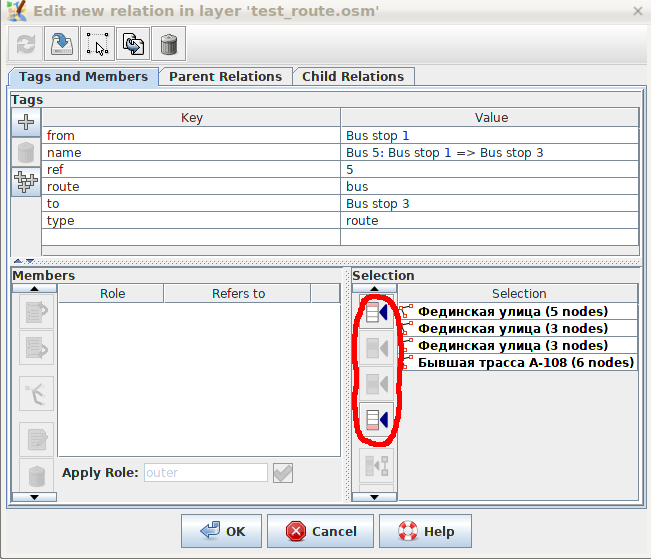
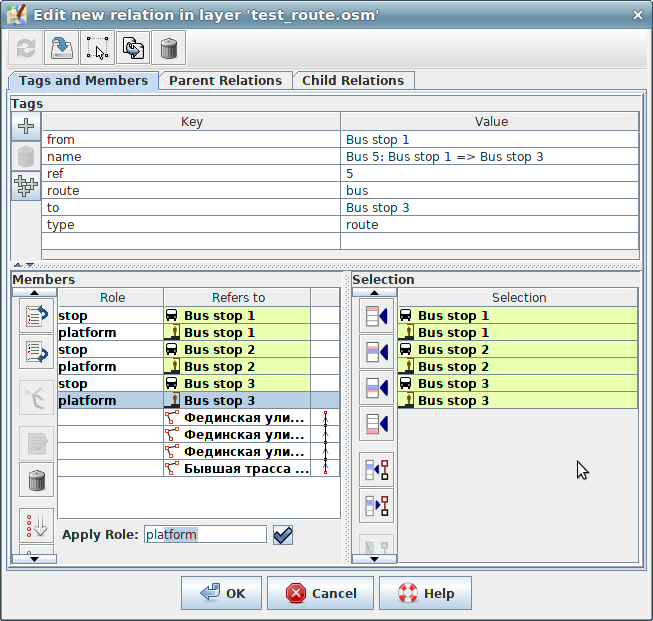
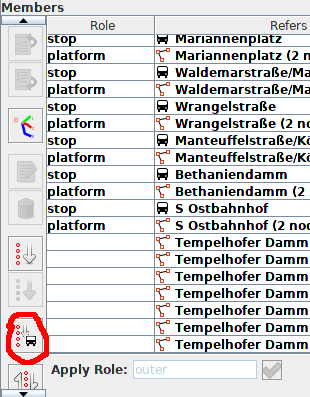
Our next move is to add nodes public_transport=stop_position and public_transport=platform. Select them on the map and, then, add to the relation (higher than ways). Enumerate them to avoid further difficulties. For example, stop_position 1, platform 1, stop position 2, platform 2 and etc. As a result, our relation editing window looks like this:
The roles for stops and platforms, however, will be automatically filled out. For instance, in the column called “Role” stop_position has an assigned “stop” role, while platform has “platform” role. We will change it just a bit here. In particular, we will change the first and the last platform and stop_position roles. Add “_entry_only” to the objects related to the first stop (stop_entry_only, platform_entry_only), it means that this stop has just one purpose - entrance. The last stop, accordingly, should be marked “_exit_only” (stop_exit_only, platform_exit_only). Sometimes the roles are not assigned automatically, then you will need to fill them in manually.
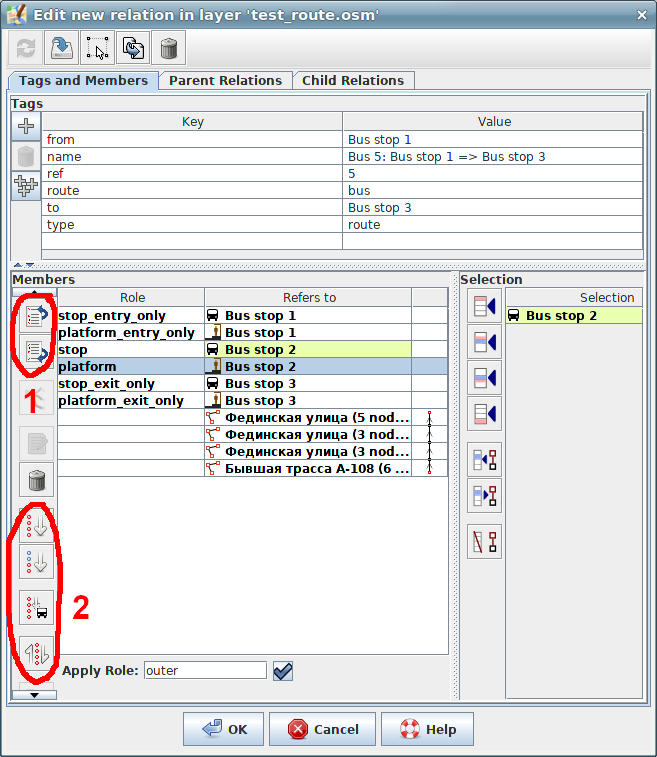
We have marked the buttons for moving and sorting the relation members as 1 and 2 (in red).
If the order of stops is incorrect, OsmAnd will NOT be able to plan a proper route for you!
To check whether the route has any gaps, use small arrows located on the right side of the way. They also will help you to determine the direction of the route.
Now, as you can see, we have a complete route, which starts at Bus stop 1 (on Fedinskaya street) and ends at Bus stop 3 (A-108).
As a rule, buses go both ways. So, why not to create a backtrack? Just start from copying the relations by pressing “Relations - Create copy of this relation”. You can also access the button in the redactor. In order not to get confused, we can delete all stop_position and platform from the relation copy and leave only the ways. By clicking on a button called “Reverse the order of the relation members” in the redactor window, we will reverse the direction of the route and, furthermore, will be able to check whether they are correct. Now, let us add stops and platforms, adding tags in the process.
All the directions, variants of route, and details attached to the route should be united relation type "route_master" which is required by the scheme PTv2. Our task now is to create a new relation and fill in the tags:
type=route_master
route_master=bus
ref=5
The tag “ref” is reserved for the number of the route.
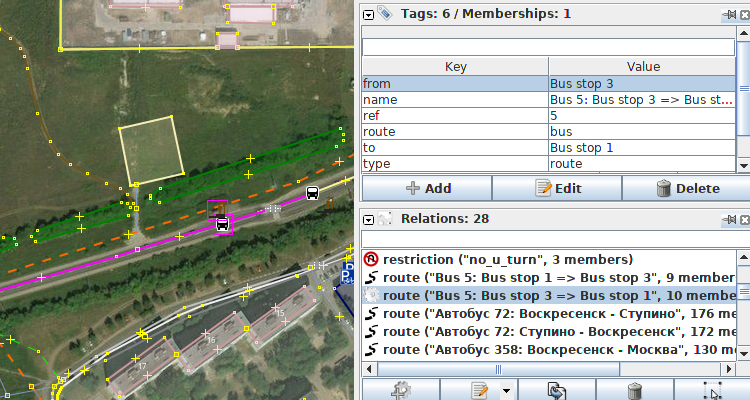
Not closing the redactor, let’s find the previously created route and choose “Select relation” from the context menu. If you did alright, which we are sure of, you will see your route change color. It will become purple, and the tags will appear on the panel “Tags / Membership”.
We will add it to “Members” using the corresponding buttons and save the relation.
To indicate a bus station, mark it with a dot or a polygon, and add tags amenity=bus_station + public_transport=station. More info about tags. You can include the station in relation to the route or create a separate bus stop and add it.
The most common mistakes
"OSM Inspector" final check (Data validator)
OSM Inspector can help you to check whether routes are correct. Use it, it does a pretty nice work!
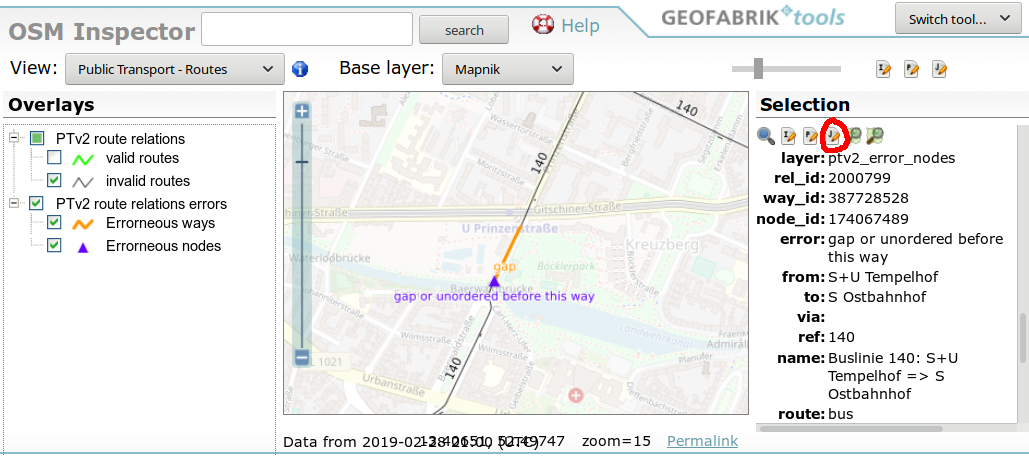
In case there is a mistake, click on it in the tab “Selection” and detailed info will appear. A vertical scroll bar will show up automatically if there are multiple mistakes on different levels. Each mistake has a letter J next to it. Click on it, and the mechanism of the remote control will open the corresponding area in JOSM.
Should the message “The OSM server ‘api.openstreetmap.org’ reported a bad request. The area you tried is too big or your request was too large. Either request a smaller area or use an export file provided by the OSM community” appear on the screen, the easiest way to resolve it would be to download this area through JOSM -> File -> Download data -> Download from Overpass API. Using Overpass API allows you to get more data from the server in one request as well as to download only the required type of data.
Gap / Gap or unordered before this way
Any unintentional split of your track will result in this mistake. Search for the relation with this mistake in the editing panel.

On this screenshot, we can see that the line which shows our route indeed has some gaps. To get to the root of the problem, click on the route segment near the split in the Members list. This way will be marked with red coloring in the main window of the program.

To move across the segments of a relation you can also use the keyboard. By going through the track manually, it is easier to spot the segment that was placed incorrectly. And when we already know what has caused the mistake, we can just drag it to its right place. You can also use buttons on your left, if you wish.
The neighboring segments may have an inverted order, which is a fairly common mistake. To correct it, we can select the disorganized tracks in the list of Members and click the button on the left, which is “Reverse the order of relation members”.
The image of a bus has been placed on the button in the latest versions of JOSM to automatically correct simple mistakes. And, finally, when we understand how to make corrections manually, we can run the program, fully controlling the process!
Empty role for non-way object In most cases, it means that we have left out one stop_position or platform role. We will need to fill in the empty role.
Road vehicle route over non-road
This message will appear when the road is closed or does not allow a certain type of transport to pass through it. Just check the track and place some corrections.
Stop without proper tags
At the place of stop, there are no tags indicating the type of transport (bus=yes, train=yes and etc.).
Route has only stops/platforms
There are no ways in the route. Just add them.
Trolley bus without trolley wire
Tag trolley ways with trolley_wire=yes to mark contact electrical network.
Unknown route type
This type of the route is unknown. Add some details.
Unknown role
The type of the role should be specified.
Stop is not node
The place of a stop (stop_position) is not a node.
Stop not on way
A stop is not implemented in your route, it should be put directly in it.
"JOSM validator" final check (Data validator)
JOSM has an inbuilt validator which checks data. It will open automatically should you try to send the data to the server, it can also be handled manually. In order to do this, search for the tab “Validation Results” on the right of the main window. Still cannot see it? Let’s turn it on through Windows -> Validation results. Click “Check” button and the whole area (if none selected) validation should start. Should you try sending data to the server, this check will work out only recently changed info.
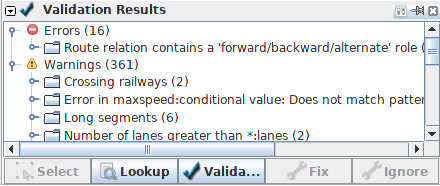
Let us go through the results related to public transport:
Route relation contains a ‘forward/backward/alternate’ role
The PTv1 scheme implies additional role assignment to a route, but it goes against PTv2 schema. Delete all the roles and, if necessary, create your route again from scratch.
Route relation contains a gap
The same as Gap / Gap or unordered before this way in OSM Inspector.
Route scheme is unspecified. Add public_transport:version
If a route matches with the PTv2 scheme (as mentioned above), add the tag public_transport:version=2 to the relation.
Stop position is not part of the route
Look up Stop not on way in OSM Inspector, because they are identical.
As you already know, a public transport function has been added in the newest release of our app. We have received some valuable feedback from our users who had already tried this function out. Unfortunately, not all the data in OSM is reliable, which causes a few problems. We sincerely hope that, with the help of these guidelines, it will be much easier for you to create and check the public transport routes.
P.S. We will do our best to upgrade these and other functional aspects of the app in the future. And remember that each user makes all the difference. Let’s create OSM together!
Join us at our groups of Telegram (OsmAnd News channel), (EN), (IT), (FR), (DE), (UA), (ES), (BR-PT), (PL), (AR), (TR).


