Category:Austria photographs taken on 2014-07-01
Jump to navigation
Jump to search

Media in category "Austria photographs taken on 2014-07-01"
The following 200 files are in this category, out of 297 total.
(previous page) (next page)-
 -3 m Brett by Markus Wilfling, Österreichischer Skulpturenpark 01.jpg 4,741 × 3,224; 4.87 MB
-
 -3 m Brett by Markus Wilfling, Österreichischer Skulpturenpark 02.jpg 4,527 × 3,233; 5.77 MB
-
 20140701 Grafenwörth Dreifaltigkeitssäule 8006.jpg 2,105 × 3,163; 2.81 MB
-
 3D Fraktal 03-H-dd by Hartmut Skerbisch, Österreichischer Skulpturenpark 01.jpg 3,186 × 4,852; 8.31 MB
-
 3D Fraktal 03-H-dd by Hartmut Skerbisch, Österreichischer Skulpturenpark 02.jpg 3,264 × 4,928; 9.57 MB
-
 Airplane Parts and Hills by Nancy Rubins, Österreichischer Skulpturenpark 01.jpg 4,829 × 3,163; 7.46 MB
-
 Airplane Parts and Hills by Nancy Rubins, Österreichischer Skulpturenpark 02.jpg 4,928 × 3,264; 9.7 MB
-
 Apatura iris (Großer Schillerfalter) und Cyaniris semiargus.jpg 1,920 × 1,277; 406 KB
-
 Apatura iris - Großer Schillerfalter, Flügelunterseite.jpg 1,920 × 1,275; 388 KB
-
 Badezimmer by Hans Kupelwieser, Österreichischer Skulpturenpark.jpg 4,833 × 3,014; 7.57 MB
-
 Bahnhof Kirchstetten Gütermagazin.JPG 3,578 × 2,389; 2.69 MB
-
 Bahnhof Kirchstetten WC.JPG 4,558 × 3,043; 2.48 MB
-
 Betonboot by Michael Schuster, Österreichischer Skulpturenpark 01.jpg 4,928 × 3,264; 8.97 MB
-
 Betonboot by Michael Schuster, Österreichischer Skulpturenpark 02.jpg 4,928 × 3,264; 7.72 MB
-
 Betonboot by Michael Schuster, Österreichischer Skulpturenpark 03.jpg 4,488 × 3,048; 7.15 MB
-
 Charioteer by Bryan Hunt, Österreichischer Skulpturenpark.jpg 3,264 × 4,928; 9.83 MB
-
 Cynodontium polycarpon (f, 150136-481744) 8913.JPG 2,816 × 1,880; 1,013 KB
-
 Cynodontium polycarpon (f, 150136-481744) 8918.JPG 2,816 × 1,880; 1.2 MB
-
 Die Erdkugel als Koffer by Peter Weibel, Österreichischer Skulpturenpark - sign.jpg 4,851 × 2,716; 6.48 MB
-
 Die Erdkugel als Koffer by Peter Weibel, Österreichischer Skulpturenpark 01.jpg 3,264 × 4,928; 7.83 MB
-
 Die Erdkugel als Koffer by Peter Weibel, Österreichischer Skulpturenpark 02.jpg 4,928 × 3,264; 7.02 MB
-
 Die Erdkugel als Koffer by Peter Weibel, Österreichischer Skulpturenpark 03.jpg 4,928 × 3,264; 7.47 MB
-
 Die Erdkugel als Koffer by Peter Weibel, Österreichischer Skulpturenpark 04.jpg 4,928 × 3,264; 10.51 MB
-
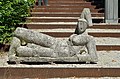 Die große Ruhende by Heinz Leinfellner, Österreichischer Skulpturenpark 01.jpg 4,928 × 3,264; 8.24 MB
-
 Die große Ruhende by Heinz Leinfellner, Österreichischer Skulpturenpark 02.jpg 4,819 × 3,186; 8.34 MB
-
 Figur III by Joannis Avramidis, Österreichischer Skulpturenpark.jpg 2,520 × 4,392; 6.12 MB
-
 Fu mit dem schönen Mandarin by Franz Xaver Ölzant, Österreichischer Skulpturenpark 01.jpg 4,928 × 3,264; 10.29 MB
-
 Fu mit dem schönen Mandarin by Franz Xaver Ölzant, Österreichischer Skulpturenpark 02.jpg 4,845 × 3,264; 10.89 MB
-
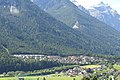
 Fulpmes - panoramio (1).jpg 5,184 × 3,456; 13.93 MB
-
 Fulpmes - panoramio (2).jpg 5,184 × 3,456; 15.88 MB
-
 Fulpmes Stubaital - panoramio (1).jpg 5,208 × 3,476; 10.46 MB
-
 Fulpmes Stubaital - panoramio (2).jpg 5,208 × 3,476; 16.26 MB
-
 Fulpmes Stubaital - panoramio (3).jpg 5,208 × 3,476; 15.72 MB
-
 Fulpmes Stubaital - panoramio (4).jpg 4,196 × 2,797; 12.88 MB
-
 Fulpmes Stubaital - panoramio.jpg 5,208 × 3,476; 19.25 MB
-
 Gewerbegebiet Muehlau-Arzl.jpg 3,415 × 2,136; 7.42 MB
-
 Gonflable 6 by Hans Kupelwieser, Österreichischer Skulpturenpark 01.jpg 4,632 × 3,104; 10.43 MB
-
 Gonflable 6 by Hans Kupelwieser, Österreichischer Skulpturenpark 02.jpg 3,264 × 4,768; 8.54 MB
-
 Große Figur für Luzern by Fritz Wotruba, Österreichischer Skulpturenpark.jpg 2,840 × 4,416; 7.61 MB
-
 Gurk Dom Hemmaquelle01.jpg 2,736 × 3,648; 4.6 MB
-
 Gurk Dom Hemmaquelle02.jpg 2,736 × 3,648; 4.28 MB
-
 Gurk Dom Hemmaquelle03.jpg 3,648 × 2,736; 5.66 MB
-
 Gurk Dom Nepomuk.jpg 2,736 × 3,648; 3.44 MB
-
 Gurk Krypta Nepomuk.jpg 3,648 × 2,736; 4 MB
-
 Hafelekar - panoramio (1).jpg 3,456 × 5,184; 18.93 MB
-
 Hafelekar - panoramio (10).jpg 5,184 × 3,456; 17.01 MB
-
 Hafelekar - panoramio (11).jpg 3,456 × 5,184; 17.68 MB
-
 Hafelekar - panoramio (12).jpg 5,184 × 3,456; 14.3 MB
-
 Hafelekar - panoramio (13).jpg 3,453 × 2,302; 7.36 MB
-
 Hafelekar - panoramio (14).jpg 5,184 × 3,456; 16.3 MB
-
 Hafelekar - panoramio (15).jpg 3,456 × 5,184; 20.06 MB
-
 Hafelekar - panoramio (16).jpg 3,456 × 5,184; 14.54 MB
-
 Hafelekar - panoramio (17).jpg 5,184 × 3,456; 15.99 MB
-
 Hafelekar - panoramio (18).jpg 5,184 × 3,456; 17.32 MB
-
 Hafelekar - panoramio (19).jpg 5,184 × 3,456; 19.24 MB
-
 Hafelekar - panoramio (2).jpg 5,184 × 3,456; 12.27 MB
-
 Hafelekar - panoramio (20).jpg 3,456 × 5,184; 19.18 MB
-
 Hafelekar - panoramio (21).jpg 5,184 × 3,456; 12.69 MB
-
 Hafelekar - panoramio (22).jpg 5,184 × 3,456; 18.83 MB
-
 Hafelekar - panoramio (23).jpg 3,456 × 5,184; 15.81 MB
-
 Hafelekar - panoramio (24).jpg 5,184 × 3,456; 18.65 MB
-
 Hafelekar - panoramio (25).jpg 3,456 × 5,184; 14.29 MB
-
 Hafelekar - panoramio (3).jpg 5,184 × 3,456; 16.74 MB
-
 Hafelekar - panoramio (4).jpg 5,112 × 3,041; 14.36 MB
-
 Hafelekar - panoramio (5).jpg 5,184 × 3,456; 17.42 MB
-
 Hafelekar - panoramio (6).jpg 5,184 × 3,456; 19.25 MB
-
 Hafelekar - panoramio (7).jpg 5,184 × 3,456; 17.63 MB
-
 Hafelekar - panoramio (8).jpg 8,166 × 2,211; 13.03 MB
-
 Hafelekar - panoramio (9).jpg 3,456 × 5,184; 15.33 MB
-
 Hafelekar - panoramio.jpg 5,184 × 3,456; 16.14 MB
-
 Haltestelle Kammer-Schörfling Bushaltestelle.JPG 5,147 × 3,436; 6.03 MB
-
 Haltestelle Kammer-Schörfling Gleisende.JPG 3,684 × 2,459; 3.19 MB
-
 Haltestelle Kammer-Schörfling Vorplatz.JPG 4,092 × 2,770; 3.76 MB
-
 Hammurabi by Josef Pillhofer, Österreichischer Skulpturenpark.jpg 3,264 × 4,784; 8.22 MB
-
 Innsbruck - panoramio (26).jpg 3,456 × 5,184; 16.45 MB
-
 Innsbruck - panoramio (27).jpg 3,456 × 5,184; 13.83 MB
-
 Innsbruck - panoramio (28).jpg 5,184 × 3,456; 15.86 MB
-
 Innsbruck - panoramio (29).jpg 3,092 × 4,677; 10.32 MB
-
 Innsbruck - panoramio (30).jpg 5,010 × 3,315; 12.47 MB
-
 Innsbruck - panoramio (31).jpg 4,778 × 3,185; 13.48 MB
-
 Innsbruck - panoramio (32).jpg 4,761 × 3,174; 11.26 MB
-
 Innsbruck - panoramio (33).jpg 5,184 × 3,456; 13.58 MB
-
 Innsbruck - panoramio (34).jpg 4,298 × 2,865; 7.69 MB
-
 Innsbruck - panoramio (35).jpg 4,434 × 2,956; 7.32 MB
-
 Innsbruck - panoramio (36).jpg 5,184 × 3,456; 14.54 MB
-
 Innsbruck - panoramio (37).jpg 3,123 × 4,685; 10.86 MB
-
 Innsbruck - panoramio (38).jpg 3,208 × 4,812; 11.78 MB
-
 Innsbruck - panoramio (39).jpg 2,961 × 4,441; 9.07 MB
-
 Innsbruck - panoramio (40).jpg 3,644 × 3,153; 9.5 MB
-
 Innsbruck - panoramio (41).jpg 2,883 × 4,324; 7.61 MB
-
 Innsbruck - panoramio (42).jpg 3,122 × 4,683; 9.72 MB
-
 Innsbruck - panoramio (43).jpg 2,993 × 4,490; 11.34 MB
-
 Innsbruck - panoramio (44).jpg 1,627 × 2,441; 2.9 MB
-
 Innsbruck - panoramio (45).jpg 4,667 × 3,111; 12.58 MB
-
 Innsbruck - panoramio (46).jpg 4,260 × 2,840; 8.88 MB
-
 Innsbruck - panoramio (47).jpg 4,215 × 2,810; 9.05 MB
-
 Innsbruck - panoramio (48).jpg 4,587 × 3,058; 10.67 MB
-
 Innsbruck - panoramio (49).jpg 2,857 × 4,286; 9.34 MB
-
 Innsbruck - panoramio (50).jpg 3,043 × 4,564; 9.87 MB
-
 Innsbruck - panoramio (51).jpg 2,849 × 4,273; 8.57 MB
-
 Innsbruck - panoramio (52).jpg 3,119 × 4,678; 10.03 MB
-
 Innsbruck - panoramio (53).jpg 3,076 × 4,614; 8.88 MB
-
 Innsbruck - panoramio (54).jpg 2,961 × 4,441; 8.86 MB
-
 Innsbruck - panoramio (55).jpg 3,306 × 2,204; 5.71 MB
-
 Jetzt by Oskar Höfinger, Österreichischer Skulpturenpark.jpg 4,143 × 3,096; 8.4 MB
-
 Kammer-Schörfling EK Km 10.840.jpg 4,115 × 2,747; 5.02 MB
-
 Kirchstetten Aufnahmegebäude.jpg 5,284 × 3,527; 4.58 MB
-
 Kirchstetten Schaltgerüst 205.jpg 5,748 × 3,837; 5.23 MB
-
 Korb by Oswald Oberhuber, Österreichischer Skulpturenpark.jpg 4,840 × 3,200; 8.09 MB
-
 Labyrinth by Matta Wagnest, Österreichischer Skulpturenpark.jpg 4,741 × 2,678; 7.72 MB
-
 Made in Italy by Jörg Schlick, Österreichischer Skulpturenpark 01.jpg 4,736 × 3,209; 7.85 MB
-
 Made in Italy by Jörg Schlick, Österreichischer Skulpturenpark 02.jpg 2,960 × 4,898; 7.58 MB
-
 Mauer by Lois Weinberger, Österreichischer Skulpturenpark.jpg 4,746 × 2,898; 7.35 MB
-
 Niklasdorf-Bf-02.jpg 2,022 × 1,316; 1.41 MB
-
 O.T. by Bruno Gironcoli, Österreichischer Skulpturenpark 01.jpg 4,641 × 3,168; 7.32 MB
-
 O.T. by Bruno Gironcoli, Österreichischer Skulpturenpark 02.jpg 4,910 × 3,226; 8.51 MB
-
 O.T. by Carmen Perrin, Österreichischer Skulpturenpark.jpg 4,928 × 3,264; 9.72 MB
-
 O.T. by Heimo Zobernig, Österreichischer Skulpturenpark 01.jpg 2,584 × 4,464; 5.65 MB
-
 O.T. by Heimo Zobernig, Österreichischer Skulpturenpark 02.jpg 4,928 × 3,264; 8.84 MB
-
 O.T. by Ingeborg Strobl, Österreichischer Skulpturenpark.jpg 4,104 × 2,824; 6.92 MB
-
 O.T. by Sabina Hörtner, Österreichischer Skulpturenpark.jpg 4,388 × 3,179; 8.99 MB
-
 Ohne Titel by Peter Kogler, Österreichischer Skulpturenpark 01.jpg 4,791 × 3,026; 8.31 MB
-
 Ohne Titel by Peter Kogler, Österreichischer Skulpturenpark 02.jpg 4,928 × 3,264; 8.6 MB
-
 Ohne Titel by Peter Kogler, Österreichischer Skulpturenpark 03.jpg 4,741 × 3,053; 9.49 MB
-
 Passauer Huette.jpg 4,000 × 3,000; 4.58 MB
-
 Pfarrkirche Großarl.jpg 2,400 × 1,600; 1.3 MB
-
 Placement (Giardini) by Manfred Wakolbinger, Österreichischer Skulpturenpark.jpg 4,867 × 2,922; 8.16 MB
-
 Pyhrnpass - Passtafel.jpg 3,264 × 2,448; 1.23 MB
-
 Raum-Deuten by Martin Schnur, Österreichischer Skulpturenpark 01.jpg 4,784 × 3,096; 7.59 MB
-
 Raum-Deuten by Martin Schnur, Österreichischer Skulpturenpark 02.jpg 2,576 × 4,848; 7.15 MB
-
 Raum-Deuten by Martin Schnur, Österreichischer Skulpturenpark 03.jpg 2,872 × 4,384; 7.22 MB
-
 Raupen von Nymphalis antiopa.jpg 1,920 × 1,491; 554 KB
-
 Rose by Rudi Molacek, Österreichischer Skulpturenpark.jpg 4,928 × 3,264; 9.71 MB
-
 Sankt Oswald bei Freistadt Pfarrkirche - Fenster 2.jpg 1,716 × 3,934; 4.04 MB
-
 Sankt Oswald bei Freistadt Pfarrkirche - Fenster 6.jpg 3,808 × 2,944; 6.14 MB
-
 Sankt Oswald bei Freistadt Pfarrkirche - Fenster 7.jpg 3,236 × 2,628; 4.57 MB
-
 Sankt Oswald bei Freistadt Pfarrkirche - Fenster 8.jpg 3,768 × 2,588; 4.96 MB
-
 Sankt Oswald bei Freistadt Pfarrkirche - Hochaltar 1.jpg 2,776 × 3,828; 6.47 MB
-
 Sankt Oswald bei Freistadt Pfarrkirche - Hochaltar 2 Oswald.jpg 3,000 × 4,000; 4.41 MB
-
 Sankt Oswald bei Freistadt Pfarrkirche - Hochaltar 6a Predella Kana.jpg 2,633 × 3,823; 6.08 MB
-
 Sankt Oswald bei Freistadt Pfarrkirche - Hochaltar 6b Predella Brotvermehrung.jpg 2,920 × 3,778; 7.17 MB
-
 Sankt Oswald bei Freistadt Pfarrkirche - Portal 1.jpg 2,662 × 3,827; 7.67 MB
-
 Sankt Oswald bei Freistadt Pfarrkirche - Portal 2 Geburt.jpg 2,457 × 1,914; 3.49 MB
-
 Sankt Oswald bei Freistadt Pfarrkirche - Portal 3 Flucht nach Hy.jpg 2,835 × 2,220; 4.65 MB
-
 Sankt Oswald bei Freistadt Pfarrkirche - Portal 4 Taufe.jpg 3,216 × 2,612; 6.55 MB
-
 Sankt Oswald bei Freistadt Pfarrkirche - Portal 5 Heirat.jpg 3,772 × 2,832; 7.83 MB
-
 Sankt Oswald bei Freistadt Pfarrkirche - Portal 6 Kreuz an der Piktenmauer.jpg 2,666 × 2,000; 3.75 MB
-
 Sankt Oswald bei Freistadt Pfarrkirche - Portal 7 Wohltäter.jpg 2,868 × 2,220; 4.26 MB
-
 Sankt Oswald bei Freistadt Pfarrkirche - Portal 8 Berufung Aidans.jpg 2,804 × 2,292; 4.68 MB
-
 Sankt Oswald bei Freistadt Pfarrkirche - Portal 9 Martyrium.jpg 3,324 × 2,708; 6.25 MB
-
 Sankt Oswald bei Freistadt Pfarrkirche - Relief Caecilia.jpg 2,574 × 2,811; 5.02 MB
-
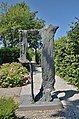
 Senkrechter Auszug aus der Urzelle by Fritz Hartlauer, Österreichischer Skulpturenpark.jpg 2,944 × 4,760; 8.32 MB
-
 Skulptur by Gerhardt Moswitzer, Österreichischer Skulpturenpark.jpg 2,600 × 4,776; 7.61 MB
-
 Speyeria aglaja - Großer Perlmutterfalter, Erlberg.jpg 1,920 × 1,283; 219 KB
-
 Sphagnum palustre (a, 150136-481739) 8881.JPG 2,816 × 1,880; 1.7 MB
-
 Sphagnum palustre (a, 150136-481739) 8883.JPG 2,816 × 1,880; 1.41 MB
-
 Sphagnum palustre (a, 150136-481739) 8887.JPG 2,816 × 1,880; 1.11 MB
-
 Sphagnum palustre (a, 150136-481739) 8894.JPG 2,816 × 1,880; 988 KB
-
 Sphagnum teres (a, 150138-481740) 8863.JPG 2,816 × 1,880; 1.04 MB
-
 Sphagnum teres (a, 150138-481740) 8865.JPG 2,816 × 1,880; 1.46 MB
-
 Sphagnum teres (a, 150138-481740) 8867.JPG 2,816 × 1,880; 1.32 MB
-
 Sphagnum teres (a, 150138-481740) 8868.JPG 2,816 × 1,880; 1.78 MB
-
 Sphagnum teres (a, 150138-481740) 8871.JPG 2,816 × 1,880; 2 MB
-
 Terrainian Platform by Thomas Stimm, Österreichischer Skulpturenpark.jpg 4,592 × 2,970; 6.97 MB
-
 Testspiel FC Red Bull Salzburg gegen Anschi Machatschkala 1. Juli 2014 01.JPG 1,477 × 2,000; 1.49 MB
-
 Testspiel FC Red Bull Salzburg gegen Anschi Machatschkala 1. Juli 2014 02.JPG 1,379 × 1,528; 1.26 MB
-
 Testspiel FC Red Bull Salzburg gegen Anschi Machatschkala 1. Juli 2014 03.JPG 1,591 × 701; 622 KB
-
 Testspiel FC Red Bull Salzburg gegen Anschi Machatschkala 1. Juli 2014 04.JPG 1,304 × 1,411; 1.16 MB
-
 Testspiel FC Red Bull Salzburg gegen Anschi Machatschkala 1. Juli 2014 05.JPG 831 × 2,000; 875 KB
-
 Testspiel FC Red Bull Salzburg gegen Anschi Machatschkala 1. Juli 2014 06.JPG 1,414 × 2,000; 1.51 MB
-
 Testspiel FC Red Bull Salzburg gegen Anschi Machatschkala 1. Juli 2014 07.JPG 1,228 × 1,741; 1.13 MB
-
 Testspiel FC Red Bull Salzburg gegen Anschi Machatschkala 1. Juli 2014 08.JPG 1,383 × 1,555; 902 KB
-
 Testspiel FC Red Bull Salzburg gegen Anschi Machatschkala 1. Juli 2014 09.JPG 942 × 1,300; 882 KB
-
 Testspiel FC Red Bull Salzburg gegen Anschi Machatschkala 1. Juli 2014 10.JPG 1,200 × 2,000; 1.41 MB
-
 Testspiel FC Red Bull Salzburg gegen Anschi Machatschkala 1. Juli 2014 11.JPG 2,000 × 2,102; 2.17 MB
-
 Testspiel FC Red Bull Salzburg gegen Anschi Machatschkala 1. Juli 2014 12.JPG 1,481 × 2,151; 1.6 MB
-
 Testspiel FC Red Bull Salzburg gegen Anschi Machatschkala 1. Juli 2014 13.JPG 1,175 × 1,719; 1.11 MB
-
 Testspiel FC Red Bull Salzburg gegen Anschi Machatschkala 1. Juli 2014 14.JPG 1,102 × 1,913; 1.16 MB
-
 Testspiel FC Red Bull Salzburg gegen Anschi Machatschkala 1. Juli 2014 15.JPG 1,705 × 1,540; 1.37 MB
-
 Testspiel FC Red Bull Salzburg gegen Anschi Machatschkala 1. Juli 2014 16.JPG 1,704 × 1,332; 1.35 MB
-
 Testspiel FC Red Bull Salzburg gegen Anschi Machatschkala 1. Juli 2014 17.JPG 2,424 × 768; 983 KB
-
 Testspiel FC Red Bull Salzburg gegen Anschi Machatschkala 1. Juli 2014 18.JPG 2,223 × 1,184; 1.46 MB
-
 Testspiel FC Red Bull Salzburg gegen Anschi Machatschkala 1. Juli 2014 19.JPG 903 × 1,534; 778 KB
-
 Testspiel FC Red Bull Salzburg gegen Anschi Machatschkala 1. Juli 2014 20.JPG 1,210 × 1,776; 1.2 MB
-
 Testspiel FC Red Bull Salzburg gegen Anschi Machatschkala 1. Juli 2014 21.JPG 749 × 1,603; 588 KB
-
 Testspiel FC Red Bull Salzburg gegen Anschi Machatschkala 1. Juli 2014 22.JPG 1,749 × 1,820; 1.2 MB
-
 Testspiel FC Red Bull Salzburg gegen Anschi Machatschkala 1. Juli 2014 23.JPG 1,578 × 1,511; 931 KB
-
 Testspiel FC Red Bull Salzburg gegen Anschi Machatschkala 1. Juli 2014 24.JPG 2,187 × 1,086; 1.28 MB
-
 Testspiel FC Red Bull Salzburg gegen Anschi Machatschkala 1. Juli 2014 25.JPG 2,055 × 1,151; 1.54 MB
-
 Testspiel FC Red Bull Salzburg gegen Anschi Machatschkala 1. Juli 2014 26.JPG 1,007 × 1,545; 1.02 MB
-
 Testspiel FC Red Bull Salzburg gegen Anschi Machatschkala 1. Juli 2014 27.JPG 1,140 × 1,483; 907 KB
-
 Testspiel FC Red Bull Salzburg gegen Anschi Machatschkala 1. Juli 2014 28.JPG 2,398 × 1,200; 1.48 MB
-
 Testspiel FC Red Bull Salzburg gegen Anschi Machatschkala 1. Juli 2014 29.JPG 726 × 1,170; 585 KB
-
 Testspiel FC Red Bull Salzburg gegen Anschi Machatschkala 1. Juli 2014 30.JPG 1,335 × 1,373; 1.2 MB
-
 Testspiel FC Red Bull Salzburg gegen Anschi Machatschkala 1. Juli 2014 31.JPG 3,008 × 2,000; 4.83 MB
-
 Testspiel FC Red Bull Salzburg gegen Anschi Machatschkala 1. Juli 2014 32.JPG 2,819 × 1,461; 2.49 MB
-
 Testspiel FC Red Bull Salzburg gegen Anschi Machatschkala 1. Juli 2014 33.JPG 743 × 1,345; 626 KB
-
 Testspiel FC Red Bull Salzburg gegen Anschi Machatschkala 1. Juli 2014 34.JPG 913 × 1,493; 849 KB
-
 Testspiel FC Red Bull Salzburg gegen Anschi Machatschkala 1. Juli 2014 35.JPG 1,162 × 1,874; 1.34 MB
-
 Testspiel FC Red Bull Salzburg gegen Anschi Machatschkala 1. Juli 2014 36.JPG 1,502 × 1,468; 1.3 MB


_und_Cyaniris_semiargus.jpg)


_8913.JPG)
_8918.JPG)


.jpg)
.jpg)
.jpg)
.jpg)
.jpg)
.jpg)


.jpg)
.jpg)
.jpg)
.jpg)
.jpg)
.jpg)
.jpg)
.jpg)
.jpg)
.jpg)
.jpg)
.jpg)
.jpg)
.jpg)
.jpg)
.jpg)
.jpg)
.jpg)
.jpg)
.jpg)
.jpg)
.jpg)
.jpg)
.jpg)


.jpg)
.jpg)
.jpg)
.jpg)
.jpg)
.jpg)
.jpg)
.jpg)
.jpg)
.jpg)
.jpg)
.jpg)
.jpg)
.jpg)
.jpg)
.jpg)
.jpg)
.jpg)
.jpg)
.jpg)
.jpg)
.jpg)
.jpg)
.jpg)
.jpg)
.jpg)
.jpg)
.jpg)
.jpg)
.jpg)


_by_Manfred_Wakolbinger,_%C3%96sterreichischer_Skulpturenpark.jpg)


_8881.JPG)
_8883.JPG)
_8887.JPG)
_8894.JPG)
_8863.JPG)
_8865.JPG)
_8867.JPG)
_8868.JPG)
_8871.JPG)


.jpg)