Category:2021 in Percival Street
Jump to navigation
Jump to search
Media in category "2021 in Percival Street"
The following 96 files are in this category, out of 96 total.
-
 HK CWB Causeway Bay 波斯富街 Percival Street CR Care taxi Uber November 2021 SS2 01.jpg 4,128 × 3,096; 3.4 MB
-
 HK CWB Causeway Bay 波斯富街 Percival Street CR Care Taxi Uber November 2021 SS2 02.jpg 4,128 × 3,096; 3.17 MB
-
 HK CWB Causeway Bay 波斯富街 Percival Street shop Maxim's Cake November 2021 SS2 03.jpg 3,096 × 4,128; 3.27 MB
-
 HK CWB Causeway Bay 波斯富街 Percival Street shop Maxim's Cake November 2021 SS2 06.jpg 4,128 × 3,096; 3.78 MB
-
 HK CWB Causeway Bay 波斯富街 Percival Street shop Maxim's Cake November 2021 SS2 08.jpg 4,128 × 3,096; 3.96 MB
-

-

-
 HK CWB 銅鑼灣 Causeway Bay Percival Street Leighton Road August 2021 SS2 007.jpg 2,576 × 1,932; 1.29 MB
-
 HK CWB 銅鑼灣 Causeway Bay Percival Street Leighton Road August 2021 SS2 014.jpg 3,096 × 4,128; 2.92 MB
-
 HK CWB 銅鑼灣 Causeway Bay Percival Street Leighton Road August 2021 SS2 016.jpg 3,096 × 4,128; 3.18 MB
-
 HK CWB 銅鑼灣 Causeway Bay Percival Street Leighton Road August 2021 SS2 022.jpg 3,096 × 4,128; 3.58 MB
-

-

-

-
-

-

-
 HK CWB 銅鑼灣 Causeway Bay Percival Street Leighton Road noodle shop August 2021 SS2.jpg 4,128 × 3,096; 3.47 MB
-

-

-
-
 HK CWB 銅鑼灣 Causeway Bay Plaza Lockhart Road 波斯富街 Percival Street August 2021 SS2 01.jpg 4,128 × 3,096; 3.88 MB
-

-

-

-

-

-

-

-

-

-

-
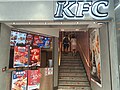 HK CWB 銅鑼灣 Causeway Bay 波斯富街 Percival Street KFC Restaurant stairs August 2021 SS2.jpg 4,128 × 3,096; 4.38 MB
-
 HK CWB 銅鑼灣 Causeway Bay 波斯富街 Percival Street shop Baleno clothing August 2021 SS2 01.jpg 4,128 × 3,096; 3.67 MB
-
 HK CWB 銅鑼灣 Causeway Bay 波斯富街 Percival Street shop Baleno clothing August 2021 SS2 02.jpg 4,128 × 3,096; 3.65 MB
-
 HK CWB 銅鑼灣 Causeway Bay 波斯富街 Percival Street shop Baleno clothing August 2021 SS2 03.jpg 4,128 × 3,096; 3.72 MB
-
 HK CWB 銅鑼灣 Causeway Bay 波斯富街 Percival Street shop Baleno clothing August 2021 SS2 06.jpg 4,128 × 3,096; 4.14 MB
-

-
-

-

-

-

-

-

-

-

-
 HK CWB 銅鑼灣 Causeway Bay 波斯富街 Percival Street 駱克道 Lockhart Road October 2021 SS2 02.jpg 4,128 × 3,096; 4.37 MB
-
 HK CWB 銅鑼灣 Causeway Bay 波斯富街 Percival Street 駱克道 Lockhart Road October 2021 SS2 04.jpg 3,096 × 4,128; 4.8 MB
-
 HK CWB 銅鑼灣 Causeway Bay 波斯富街 Percival Street 駱克道 Lockhart Road October 2021 SS2 05.jpg 3,096 × 4,128; 4.3 MB
-
 HK CWB 銅鑼灣 Causeway Bay 波斯富街 Percival Street 駱克道 Lockhart Road October 2021 SS2 07.jpg 4,128 × 3,096; 4.02 MB
-
 HK CWB 銅鑼灣 Causeway Bay 波斯富街 Percival Street 駱克道 Lockhart Road October 2021 SS2 10.jpg 3,096 × 4,128; 3.52 MB
-
 HK CWB 銅鑼灣 Causeway Bay 波斯富街 Percival Street 駱克道 Lockhart Road October 2021 SS2 11.jpg 3,096 × 4,128; 4.42 MB
-

-

-

-

-

-

-

-

-

-
-

-

-

-

-
 HK CWB 銅鑼灣 Causeway Bay 軒尼詩道 Hennessy Road evening October 2021 SS2 16.jpg 2,576 × 1,932; 1.08 MB
-

-
 HK CWB 銅鑼灣 Causeway Bay 駱克道 Lockhart Road September 2021 SS2 140.jpg 3,096 × 4,128; 3.53 MB
-
 HK CWB 銅鑼灣 Causeway Bay 駱克道 Lockhart Road September 2021 SS2 142.jpg 2,576 × 1,932; 1.41 MB
-
 HK CWB 銅鑼灣 Causeway Bay 駱克道 Lockhart Road September 2021 SS2 147.jpg 4,128 × 3,096; 4.21 MB
-
 HK CWB 銅鑼灣 Causeway Bay 駱克道 Lockhart Road September 2021 SS2 151.jpg 4,128 × 3,096; 4.28 MB
-
 HK CWB 銅鑼灣 Causeway Bay 駱克道 Lockhart Road September 2021 SS2 152.jpg 3,096 × 4,128; 3.79 MB
-
 HK tram 174 tour view 銅鑼灣 Causeway Bay 波斯富街 Percival Street December 2021 SS2 001.jpg 3,264 × 2,448; 3.24 MB
-
 HK tram 174 tour view 銅鑼灣 Causeway Bay 波斯富街 Percival Street December 2021 SS2 002.jpg 3,264 × 2,448; 3.29 MB
-
 HK tram 174 tour view 銅鑼灣 Causeway Bay 波斯富街 Percival Street December 2021 SS2 003.jpg 3,264 × 2,448; 3.33 MB
-
 HK tram 174 tour view 銅鑼灣 Causeway Bay 波斯富街 Percival Street December 2021 SS2 004.jpg 3,264 × 2,448; 3.36 MB
-
 HK tram 174 tour view 銅鑼灣 Causeway Bay 波斯富街 Percival Street December 2021 SS2 005.jpg 3,264 × 2,448; 3.52 MB
-
 HK tram 174 tour view 銅鑼灣 Causeway Bay 波斯富街 Percival Street December 2021 SS2 006.jpg 4,000 × 3,000; 5.73 MB
-
 HK tram 174 tour view 銅鑼灣 Causeway Bay 波斯富街 Percival Street December 2021 SS2 007.jpg 3,000 × 4,000; 5.22 MB
-
 HK tram 174 tour view 銅鑼灣 Causeway Bay 波斯富街 Percival Street December 2021 SS2 008.jpg 3,264 × 2,448; 3.6 MB
-
 HK tram 174 tour view 銅鑼灣 Causeway Bay 波斯富街 Percival Street December 2021 SS2 009.jpg 3,264 × 2,448; 3.43 MB
-
 HK tram 174 tour view 銅鑼灣 Causeway Bay 波斯富街 Percival Street December 2021 SS2 010.jpg 3,264 × 2,448; 3.18 MB
-
 HK tram 174 tour view 銅鑼灣 Causeway Bay 波斯富街 Percival Street December 2021 SS2 011.jpg 3,264 × 2,448; 3.19 MB
-
 HK tram 174 tour view 銅鑼灣 Causeway Bay 波斯富街 Percival Street December 2021 SS2 012.jpg 2,448 × 3,264; 3.21 MB
-
 HK tram 174 tour view 銅鑼灣 Causeway Bay 波斯富街 Percival Street December 2021 SS2 013.jpg 2,448 × 3,264; 2.81 MB
-
 HK tram 174 tour view 銅鑼灣 Causeway Bay 波斯富街 Percival Street December 2021 SS2 014.jpg 2,448 × 3,264; 3.48 MB
-
 HK tram 174 tour view 銅鑼灣 Causeway Bay 波斯富街 Percival Street December 2021 SS2 015.jpg 2,448 × 3,264; 3.75 MB
-

-
 HK WCD 灣仔區 Wanchai District 軒尼詩道 Hennessy Road November 2021 SS2 030.jpg 4,128 × 3,096; 4 MB
-
 HK WCD 灣仔區 Wanchai District 軒尼詩道 Hennessy Road November 2021 SS2 032.jpg 3,096 × 4,128; 3.95 MB
-
 T-shaped street signs at Percival Street, Causeway Bay part 2 in September 2021.jpg 3,000 × 4,000; 3.67 MB
-
 T-shaped street signs at Percival Street, Causeway Bay part 3 in September 2021.jpg 2,850 × 4,000; 2.25 MB
-
 T-shaped street signs at Percival Street, Causeway Bay part 4 in September 2021.jpg 4,000 × 3,000; 3.65 MB
-
 T-shaped street signs at Percival Street, Causeway Bay part 5 in September 2021.jpg 4,000 × 3,000; 3.73 MB


