Travel Guides
This article is incomplete & needs to be reviewed. You can help by creating a pull request.
Travel Guides is a paid feature of the OsmAnd app.
Overview
Virtual travel guides in OsmAnd offer users valuable information, recommendations, and tips. They also allow travelers to access comprehensive navigation information about attractions in the app.
OsmAnd travel guides are based on data from Wikivoyage, a community project similar to Wikipedia, where volunteer authors create up-to-date articles.
Wikivoyage information includes the main facts about a place, transportation, attractions, shopping, and more.
- Android
- iOS
How to use
- Download Travel guides.
- Browse articles about a country, region, city, attractions.
- Alternatively display travel guides articles and / or points on the map using Configure map menu.
- Browse through attractions on the map, add them to Map markers or Favorites.
- Using Read full button go to the Article inside Travel guides*.
- Bookmark articles to read them later.
- Chose points from articles to visit and add them to the OsmAnd map.
- Get more information about places to visit from offline wikipedia articles.
- Build a route to chosen touristic attractions or a free walk between points.
Travel guides articles are stored inside OsmAnd in form of GPX tracks with Waypoints. After adding these tracks to the map (see Points or Travel routes sections of this article), you can manage them via My Places menu.
Download articles
- Android
- iOS
Menu → Travel guides
Menu → Travel guides (Beta)
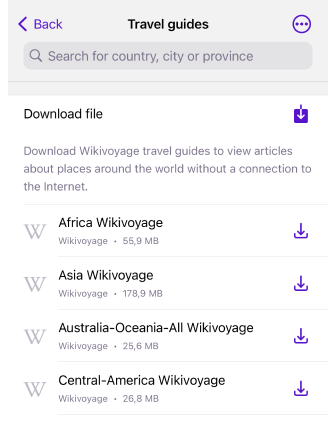
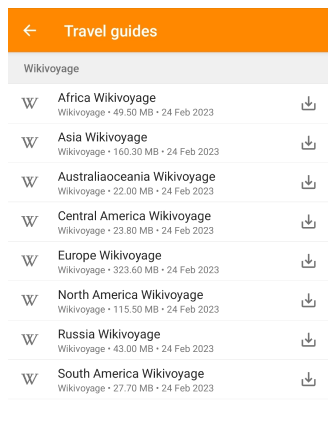
Before you start using travel guides, you need to download them via the Download map menu (Menu → Maps & Resources → Travel guides). The articles are grouped by regions: Africa, Asia, Australia and Oceania, Central America, Europe, North America, Russia, and South America, so you don't have to download travel books for a separate city or country.
By saving the required regions on your device, you can browse the articles with OsmAnd even when you are abroad or out of range of your mobile network.
In addition to guides to countries, regions, or cities, you can find guides to places from movies, books, computer games, places of memory of great people, and so on. There are also specialized guides, such as the UNESCO Global Geoparks Network list or the world's largest and most complex international airports.
Browse Articles
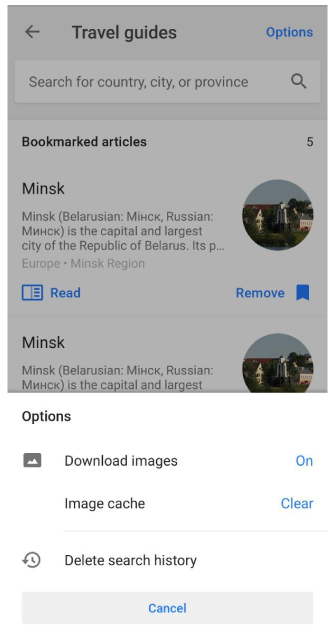
The Travel guides screen consists of two general parts: a search field and a travel guides list with two tabs: Explore and Bookmarked articles. You can switch between them with a single tap a tab.
When you open Travel Guides (Menu → Travel guides), OsmAnd will show you articles about interesting places located near the geographic coordinates of the current center of the map. When you tap the item from the list the Travel guide article opens. At the bottom of the screen is a switch to the Bookmarks tab.
Explore and Bookmark
- Android
- iOS
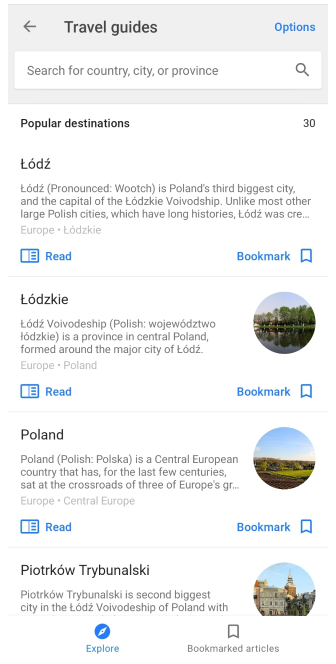

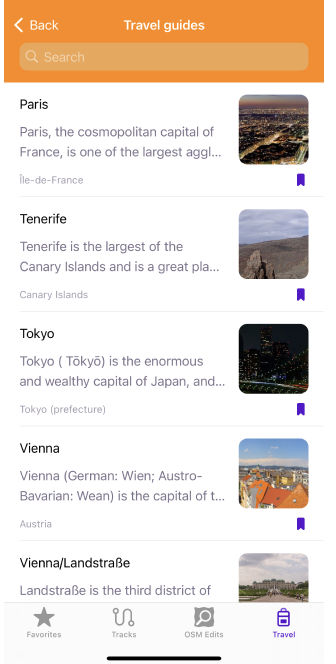
On the Explore or Popular destinations tab, the top 30 articles about destinations are listed adjacent to the center of the screen (out of location). By tapping an item from the list with a title and a brief description of the article, you can view the full text of that article.
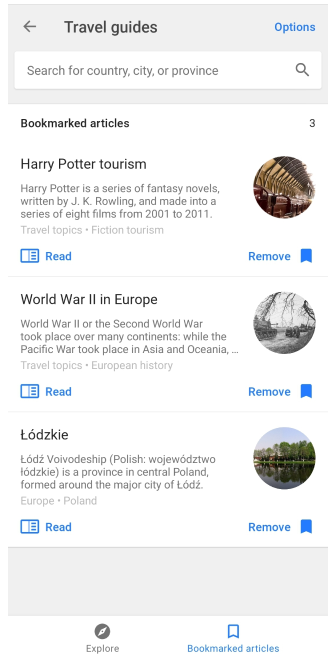
If you tap the Bookmark button, the article will be saved for later reading and will be available in the Bookmarks tab. In the Bookmarked Articles tab, articles are arranged as they are saved, with the newest articles at the top.
- Read. Opens Travel article.
- Bookmark. Moves the selected article to Bookmarked articles.
- Remove. Removes the selected article from Bookmarked articles.
Search
- Android
- iOS

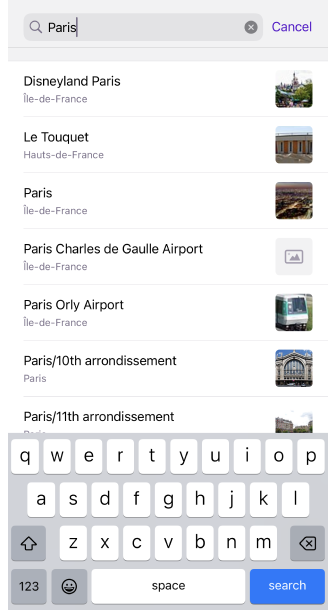
Search field is located at the top of the Travel guides screen. If you start typing the first letters of a country, city, or famous place, a list of articles will appear under the search field. By touching the needed one, you can start reading.
Next to each search result are listed the first 3 most commonly used languages in which the selected article can be read. However, popular articles are available in many more languages than the 3 listed.
Additional features
- You can search for some special Cultural attractions, such us Harry potter tourism, Ghost towns, Monarchies, and other.
- To delete the search history, you need to use the Options button.
Options
- Android
- iOS
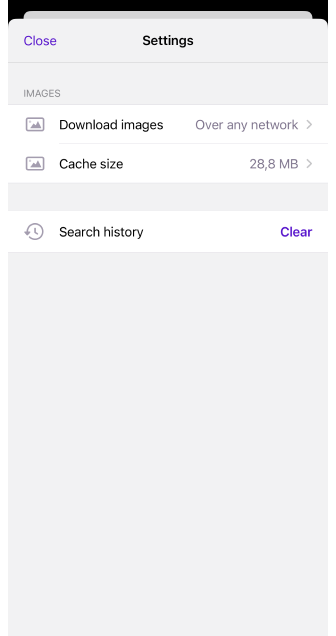
In this menu you can customize the appearance of articles when working offline. NOTE, that downloaded travel guides do not contain images. They only appear when you view articles with an active Internet connection.
In the Options menu, you can choose whether or not to save images in the viewed articles to use them when you are offline. You can also clear existing images cash or delete the search history (only works wehen searching in Travel guides).
- Download images. Images in articles can be downloaded for offline use.
- Image cache. Clears the images cache to free up memory.
- Delete search history. Clears search history.
Travel Article
- Android
- iOS
You can open an article from the suggested options on the Explore tab or by using the Search option. If you have added touristic attractions called Points to the OsmAnd map from Travel guide article, you can also open the article using Read full button in the description section of the waypoint.
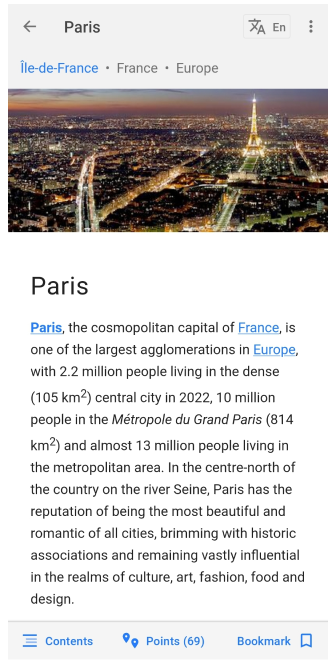
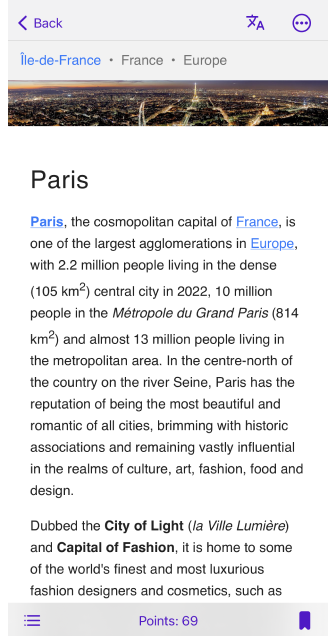
The following controls are located at the top of the screen:
- Switch to change the language of the article. The language can be selected from the available options.The system language is used by default.
- Using the ⋮ button you can share the article with your friends. The link opens in the OsmAnd app, apropriate travel guides file should be downloaded on the recipient's device or Wikivoyage site, if recipient does not have the OsmAnd app or for iOS devices.
- Taping the navigation bar opens Travel guides Navigation menu.
At the bottom of the screen are buttons such as:
- Contents. Opens the table of contents of the article.
- Points. Shows tourist attractions related to the article on a map.
- Bookmark. Allows you to add an article to bookmarks for later reading.
Navigation menu
- Android
- iOS
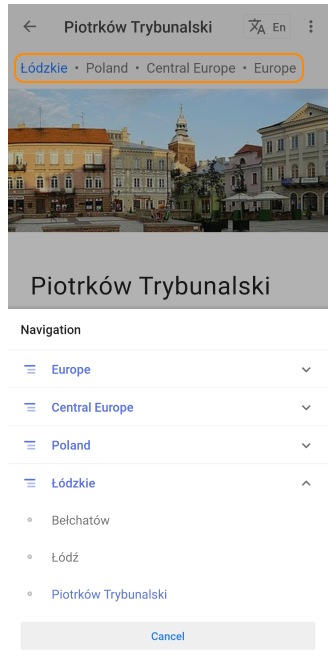
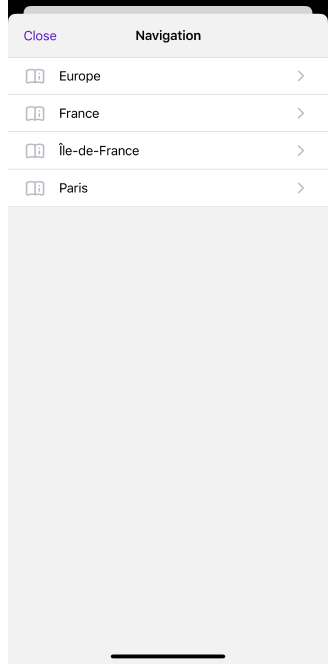
To move one article to another in the Travel guide articles, use the Navigation menu. You can access it by tapping on the address field above the image. NOTE, that the articles in the Travel Guides are grouped as follows: Continent → Region → Country → Province (region) → City. If you tap the arrow in the upper left corner of the screen, you will go directly to the Explore or Bookmarked articles tab (depending on which tab you opened earlier).
Table of contents
- Android
- iOS
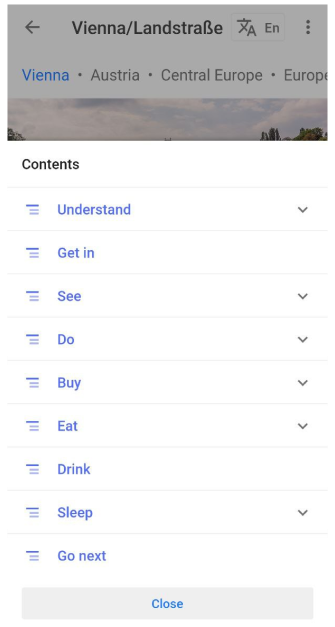
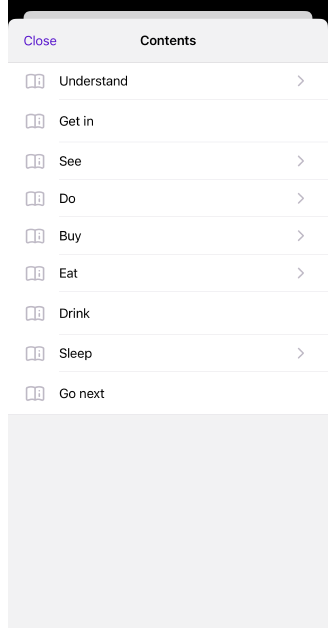
Most Travel guide articles have the same content structure: introduction (images and description of the tourist site) and subsequent chapters.
- Understand. Details about local culture and habits.
- Get in. How to get to the area, places, and so on, and how much this route will cost.
- See. A list of attractions (museums, historical sites, and so on) with full descriptions: ticket prices, opening hours, useful links, and phone numbers.
- Do. Places to spend time.
- Buy. Sites to shop.
- Eat. Catering facilities (divided by budget: budget, mid-range, splurge).
- Drink. Bars and cafes.
- Sleep. Accommodations divided by budget (budget, mid-range, splurge).
- Go next. Nearest places from Wikivoyage.
Points
- Android
- iOS
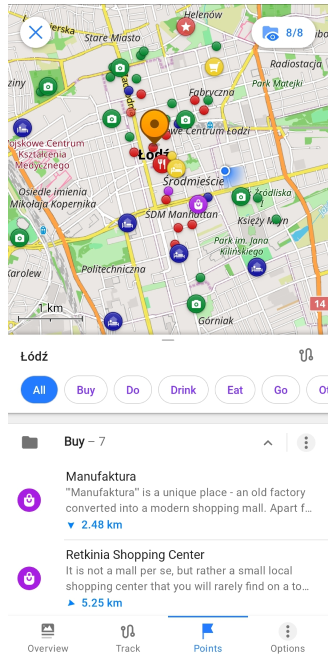
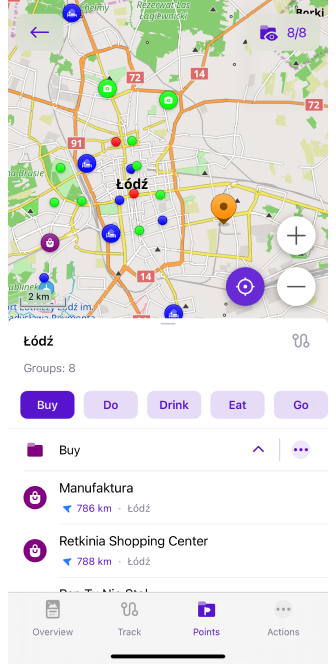
Travel guide articles often contain tourist attractions grouped by topic. By tapping onece on the Points button at the bottom of the Article, all attractions related to the topic (eating places, accommodation options, airports, shops, historical monuments, and so on) will be added to the map and can be managed as a Track.
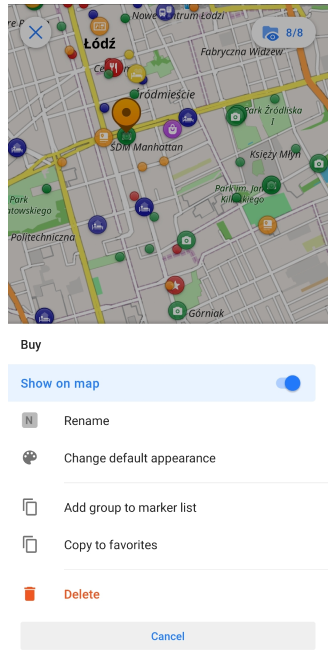
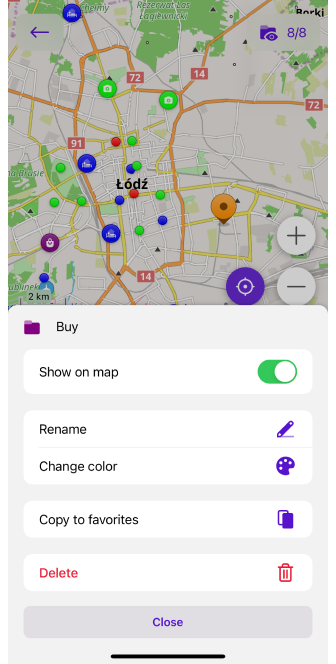
By default, attraction groups are marked with certain icons: Eat and Drink categories with a knife and fork in a red circle, Do and See with camera in a green circle, and other. You can manage groups of points with ⋮ like a Waypoint folder.
Points in Travel articles refer to waypoints on a GPX track.
You can also add points to the map in Configure map menu. You can display them all or select a specific category.
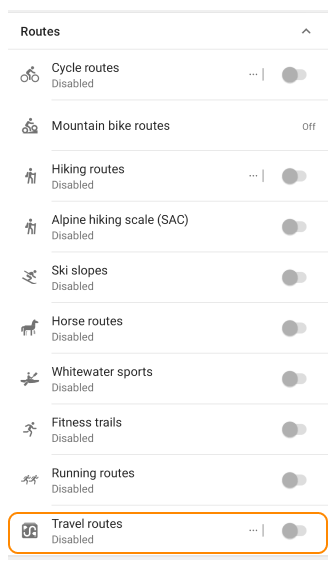
Travel routes
Menu → Configure map → Travel routes
An alternative way to browse Travel guides is to display them on the map using Configure map menu. This feature does not apply to the ability provided by OsmAnd to use Wikivoyage, it only applies to tracks. You can read more in our blog.

Travel routes and articles on the map
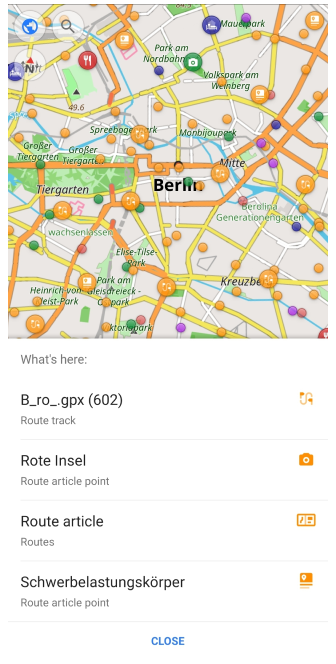
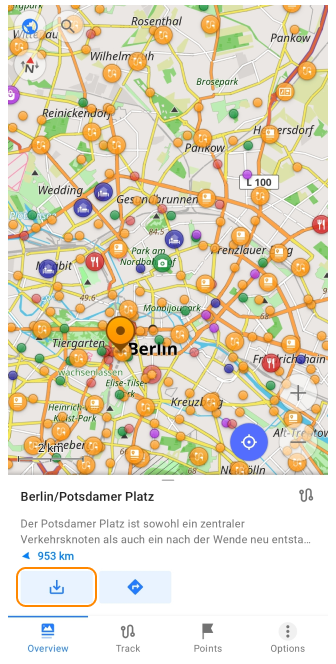
After you enable Travel routes display in the Configure map menu, circles of different colors will appear on the map. The orange ones represent routes tracks, route articles, and some waypoints. If you tap a specific route, article, or point and then tap Download button (⍗), you can manage them as a track.
Custom Travel guides
We recommend you to add new articles or edits to Wikivoyage. We update the Travel guides about every 6 months, and you can download new articles. You can also create your own Travel book. How to make it is described in tecnical documentation (see Create custom Travel guide article).
Manage as GPX Track
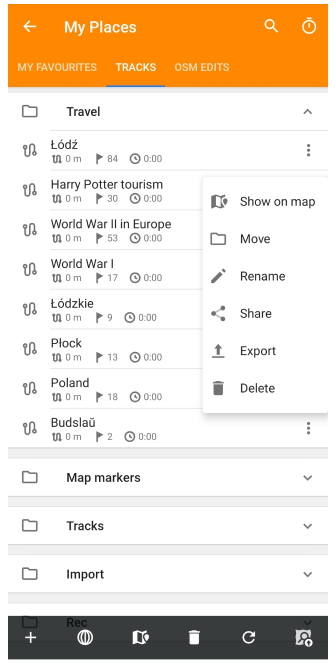
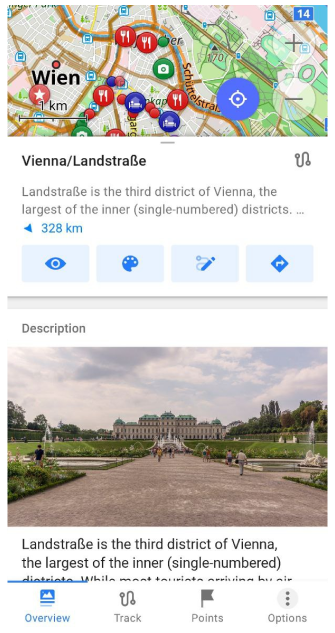
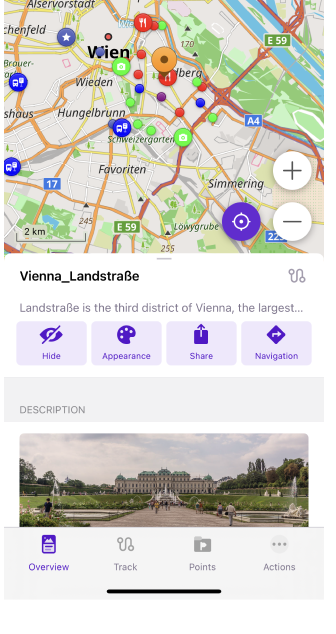
After you add Travel guides to the map, Travel articles can be saved as a GPX track and managed through the My places menu (Menu → My Places → Tracks → Travel). They can be displayed on the map, shared, renamed, placed in another folder, exported or deleted.
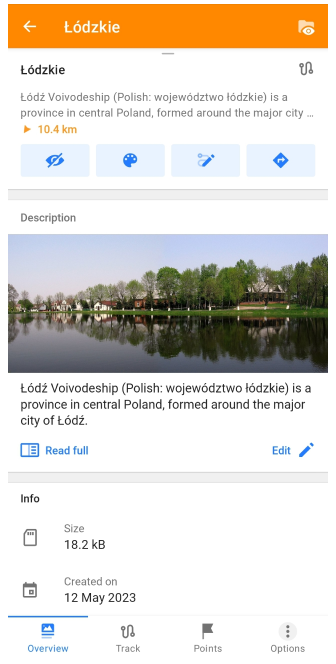
- In Overview, you can read brief description or open Travel guide article by taping Read full button. Edit allows you to correct the article.
- There is no information in the Track section, the GPX files of Travel guides contain only waypoints.
- Under Points you see folders with points grouped by name (Buy, Do, Drink, and so on).
- The Option button performs the same functions as in the regular track.
Points are stored in a GPX-file (a commonly used format for tracks) as Waypoints. The number of points (waypoints) in the track contains is marked next to the icon 🚩 in the track field.
In Track Context menu of GPX-file you can find general information about the article to which this track belongs.
Combine with Wikipedia
- Android
- iOS
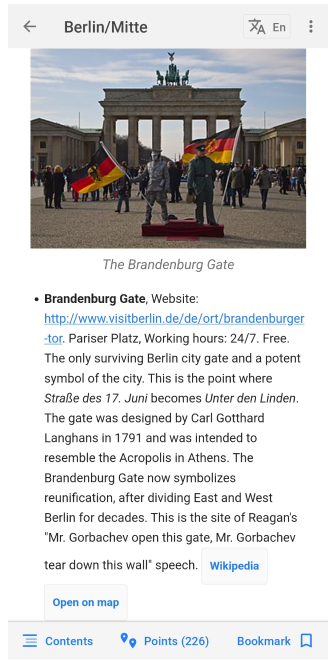
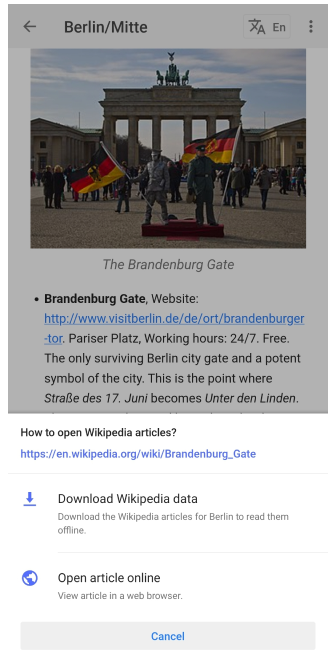

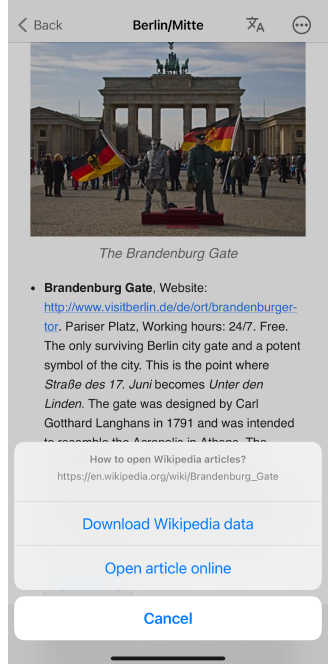
In the Travel guides articles you can find useful information about tourist attractions (contact information, web links, prices, and so on). Many articles have a Wikipedia button that allows to open a Wikipedia article (online or offline) about the place of interest.
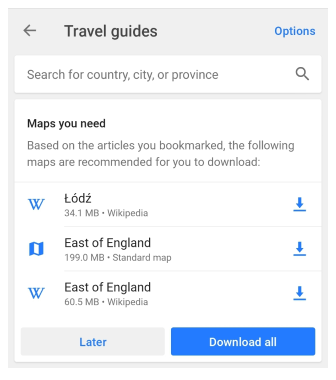
In some cases, OsmAnd's Bookmarks tab will prompt you to download Wikipedia map layer to browse related articles offline.
The Wikipedia plugin is a paid feature of the OsmAnd app.